
Before you install Nucleus Co-op
Start with a normal Windows game installation that launches by itself. Nucleus Co-op relies on the game and its handler working together; it cannot repair a game that already fails outside the application. Confirm the game opens normally, note the exact game version, and close other launchers or overlays that may interfere with a first test.
Use the verified download page for the application, then check the listed prerequisites. The current guide records .NET Framework 4.7.2 or newer and Visual C++ x86/x64 redistributables as release requirements. If Windows blocks the file, do not immediately disable protection. Check the file source, version, and release provenance first, then use the safety and troubleshooting pages for the next decision.
- A legitimate Windows installation of the game you want to test.
- A local writable folder for Nucleus Co-op rather than a cloud-synced path.
- The current handler or game-specific setup notes.
- At least one controller or keyboard arrangement that you can identify clearly.
- A record of the game version and any required launcher, mod, or dependency.
Install or extract the application
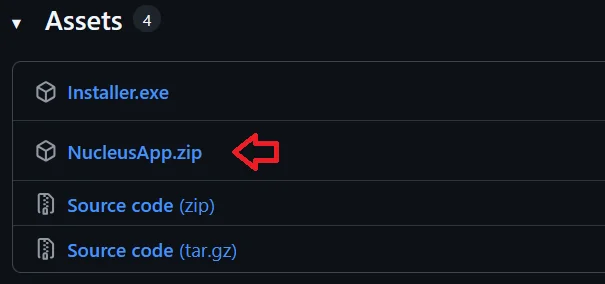
For most new users, Installer.exe is the simplest path. Run it, choose a local destination, and let the installer create the application files. If you prefer a portable folder, download NucleusApp.zip, extract it with a standard archive tool, and use the password shown on the verified download page when the release requires one. Do not extract the application into a Windows system directory or into a folder that another sync service is constantly rewriting.
Open Nucleus Co-op once after installation. A first launch is a baseline check, not a game test. If the application cannot start, resolve the permission or dependency problem before you install a handler. If the application opens but the handler downloader does not respond, WebView2 or a network/security rule may be relevant; use the handler guide instead of downloading an unknown replacement executable.
Choose a local folder
Use a short, writable path that is easy to find again. Avoid OneDrive and protected Windows folders during the first setup.
Run the installer or extract the ZIP
Use Installer.exe for guided setup, or extract NucleusApp.zip and keep the extracted folder intact.
Open Nucleus Co-op once
Confirm that the app can read its own files before you add a game handler.
Record the working path
Keep the application path, game path, and handler location available when you ask for support.
Add the correct game handler
A handler is the game-specific instruction layer that tells Nucleus Co-op how to find, launch, arrange, and connect instances for a particular title. It is not a universal mod and it is not the game itself. That distinction explains why the application can be installed correctly while one title still needs a different handler, a particular game build, or an additional mod.
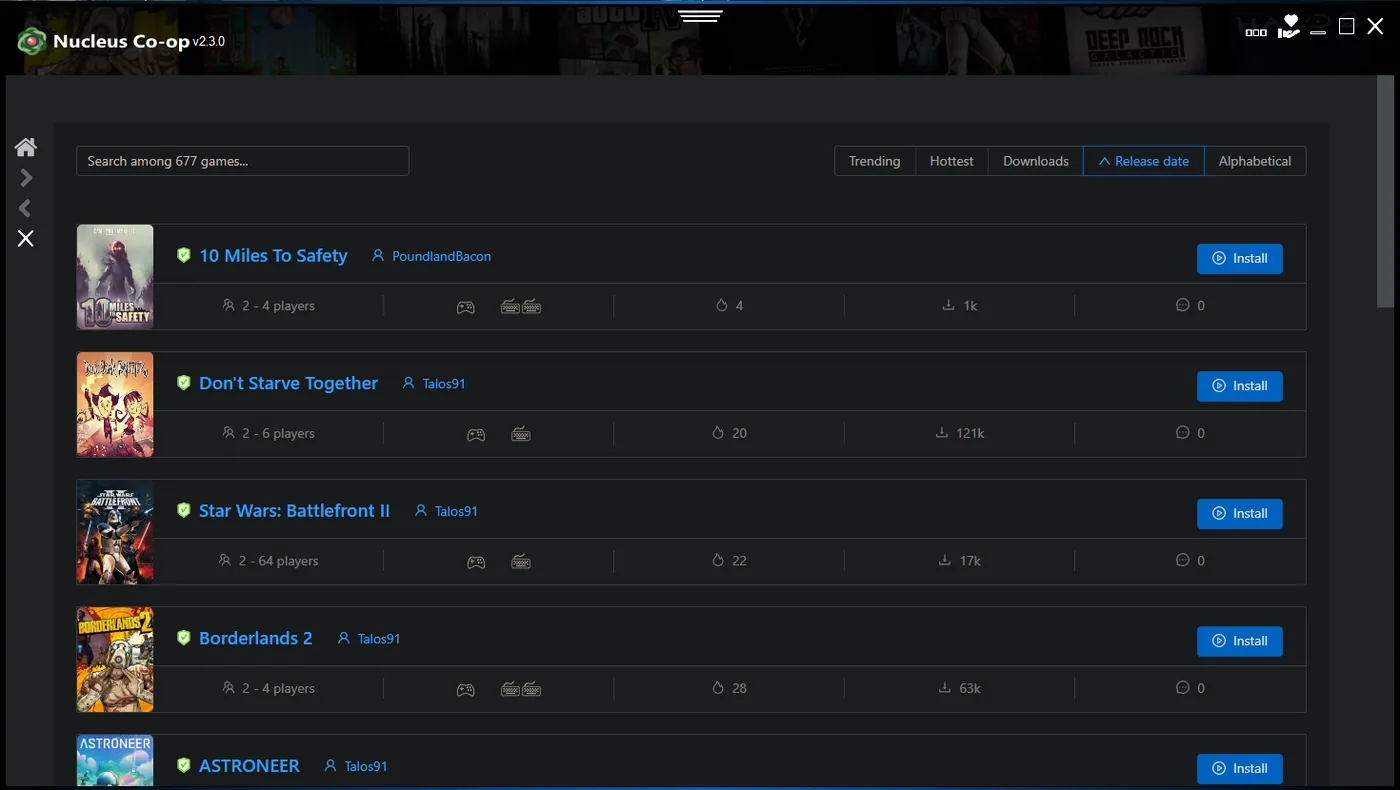
Open the supported games list, locate your game, and read the current notes before you install anything. Check the game name carefully when editions share a short name. Modern Warfare 2, Minecraft Java and Minecraft Bedrock, and different Call of Duty releases should not be treated as interchangeable pages. Use the exact handler instructions for the version you own.
- Match the handler to the exact game title and edition.
- Read requirements for launchers, mods, DLC, or a particular game build.
- Keep the handler source and date visible so you can roll back a bad update.
- Do not combine several community fixes until the basic handler launch works.
- If the built-in handler downloader fails, follow the manual handler notes from the official hub or troubleshooting guide.
Assign controllers and keyboard inputs
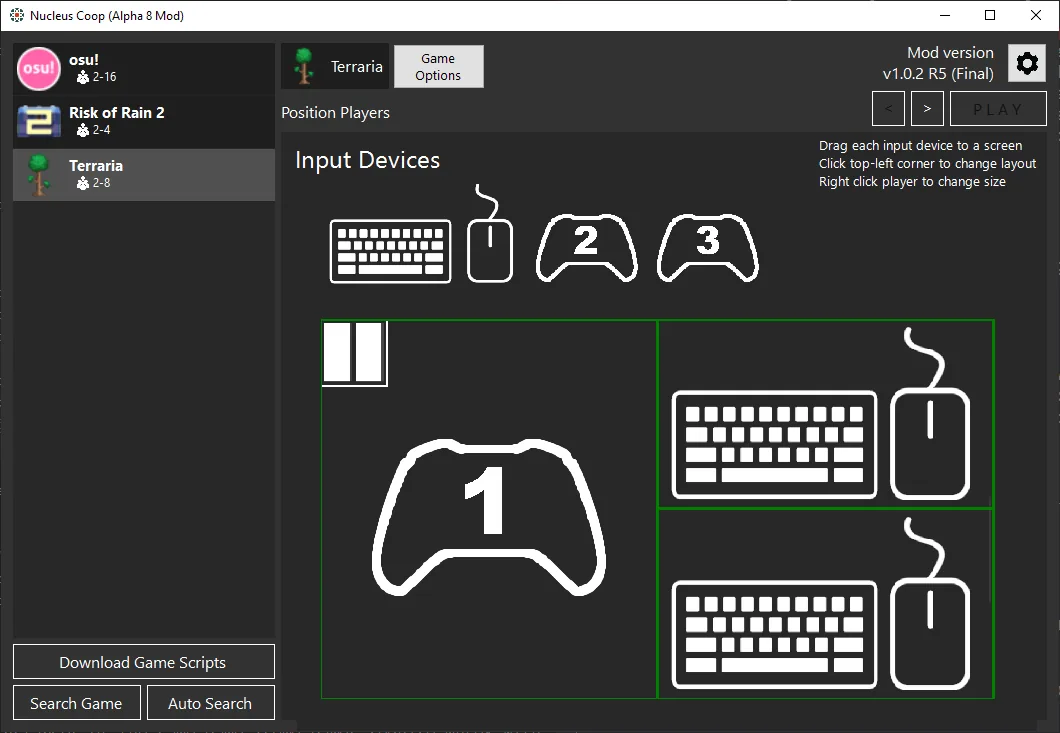
Connect the input devices you intend to use before you launch the instances. Give each controller a simple identity, such as Controller 1 or the left USB port, and test it in Windows or the game before you troubleshoot Nucleus Co-op. If the same controller moves both windows, the issue is usually input isolation or an input API mismatch rather than the game's resolution settings.
Keep the first test simple. Two identical controllers can be easier to diagnose than one controller, one keyboard, a Joy-Con pair, and a virtual input tool all at once. Once the handler launches correctly, add the more complicated input arrangement and record which change caused a problem.
| Input setup | First check |
|---|---|
| Two XInput controllers | Confirm Windows exposes two separate controllers before launch. |
| PS4 or PS5 controller | Check whether the game or handler expects a translated XInput device. |
| Joy-Con or mixed devices | Test one device type first; mixed APIs can make assignment confusing. |
| Keyboard and mouse | Confirm which instance receives the keyboard focus and mouse capture. |
| One controller controls both | Stop the session and use the controller troubleshooting guide before relaunching. |
Test the first split-screen launch
Launch one supported game with the smallest number of changes possible. Let Nucleus Co-op create or arrange the instances, then confirm that both windows open, each input device reaches the correct window, and the game's own LAN, online, or mod connection step works as the handler expects. Some games connect through a local network path; others depend on a game-specific mod or an existing multiplayer mode.
Do not judge a setup only by the fact that two windows appeared. A partially working launch can still have shared input, a missing save location, a broken resolution, or an instance that never connected. Test movement, menu navigation, a short save or checkpoint, and a clean exit before you invest time in a long session.
Launch one title
Use the exact handler and game version you recorded before setup.
Check both windows
Confirm the instances are visible, placed correctly, and not stuck behind another window.
Check each input
Move one player at a time and verify that the other instance stays independent.
Check the connection
Follow the game-specific LAN, online, or mod connection step instead of assuming Nucleus Co-op creates it.
Exit cleanly
Close the session and note where saves, logs, or handler-generated files were written.
Common Nucleus Co-op installation mistakes
The most common setup mistake is changing too many variables at once. Moving the app, updating the game, replacing a handler, installing a virtual controller, and changing Windows Defender rules in one attempt makes the result impossible to explain. Make one controlled change, repeat the same launch, and keep the error message if it returns.
Another mistake is treating the handler as a generic add-on. A handler can be sensitive to a game update, a launcher path, a mod loader, a specific executable name, or a network mode. If an older guide says a game works but the current handler notes say otherwise, follow the current notes and record the date.
- Installing into OneDrive and then troubleshooting file synchronization as if it were a game error.
- Using a handler for a similarly named but different game edition.
- Testing only with a complex controller stack instead of a simple baseline.
- Disabling antivirus protections without checking the release source and file signature first.
- Assuming that a second window means the game is already connected for local co-op.
Practical notes for a stable setup
How to install Nucleus Co-op FAQ
Can I install Nucleus Co-op in Program Files?
It may work, but a simple writable local folder is easier to troubleshoot because protected directories can create access-denied or file-write problems.
Do I need to install handlers separately?
Usually yes. The application and the game-specific handler are separate parts of the workflow, and the handler may have its own requirements.
Why does my handler not see the game?
Check the game path, the game edition, the executable name, permissions, and the handler notes. The game should also launch normally outside Nucleus Co-op.
Can I use one game copy for multiple instances?
The answer depends on the game's behavior and the handler. Follow the specific game guide and use legitimate game installations; do not assume a generic rule applies to every title.
What should I do if the first launch fails?
Write down the exact error, game version, handler version, controller setup, and install path, then use the troubleshooting hub without changing several unrelated settings at once.
Choose one supported game
Once the application is installed, the games list is the safest next step because it routes you to the right handler and version-specific notes.
Browse supported games